Happy Days Quilting

A blog about Applique and Quilting

Monday 31 January 2011

Design wall Monday

At last I have a new design wall, and here's whats on it


Applique set up

I like a tidy set up when I'm working (everything in it's place)


I made my own ironing board, it's just the right size for smaller projects (it needs to be recovered soon thou as it has started to go brown in places from the heat)

I use a Clover mini iron, I find it does a really good job and is not as heavy as a normal iron to work with.


I use a templar plastic to make my templates out of, I did  use freezer paper for a long time, but I found it would sometimes crease while turning the fabric over it and then distort the leaf etc

I use small sand paper dots on my templates to stop them from sliding (they are intended for rulers to stop them from slipping when cutting)


I try to keep all my pieces organised in the drawers, and I put the templates in the Hello Kitty pencil case


I use spray starch, I spray directly into the cap and then apply it with a small paint brush that I keep attached to the bottle with an elastic band when not in use

My favourite bit of kit thou is my MP3 player that I use to listen to audio books on

Sunday 30 January 2011

Finished photo's of the Cyclamen wallhanging


Ive' worked hard on my Rose quilt this weekend and I managed to applique a good sized section yesterday and today I made up some more leaves and stems and then I glued them in place.


I used my ironing board to place my quilt on while glueing on the stems etc as the height was better and I wasn't bending so much, my neck is already sore from all the sewing I'm doing.

I have been listening to the audio book of The Lost Symbol by Dan Brown so the time went by quite quickly.

Wednesday 26 January 2011

A cushion I made in evening class


This is an applique cushion I made many moons ago.


 It has very stuffed tulips they are directly stuffed between the applique layers, its not trapunto, which I had not heared of then.

A flower wallhanging

This I made for my Mother for Mothers Day I believe (I'm a very good daughter you know)    


It is machine appliqued and quilted in the ditch (It was made in the days when I was afraid of free motion quilting).


The patterns are from Machine Applique by Sue Nickels.

Wednesday 19 January 2011

My Holiday Project

Me sewing the baskets handle by the pool in Kefelonia

My quilting hobby has been off and on a lot over the last 8 years, its either all I can think about and want to do and then i might not do anything for months!
But last year i was quite prolific (well for me that is) and when it came time for my 2 weeks holiday, panic set in "no quilting for 2 weeks" how will I cope?.
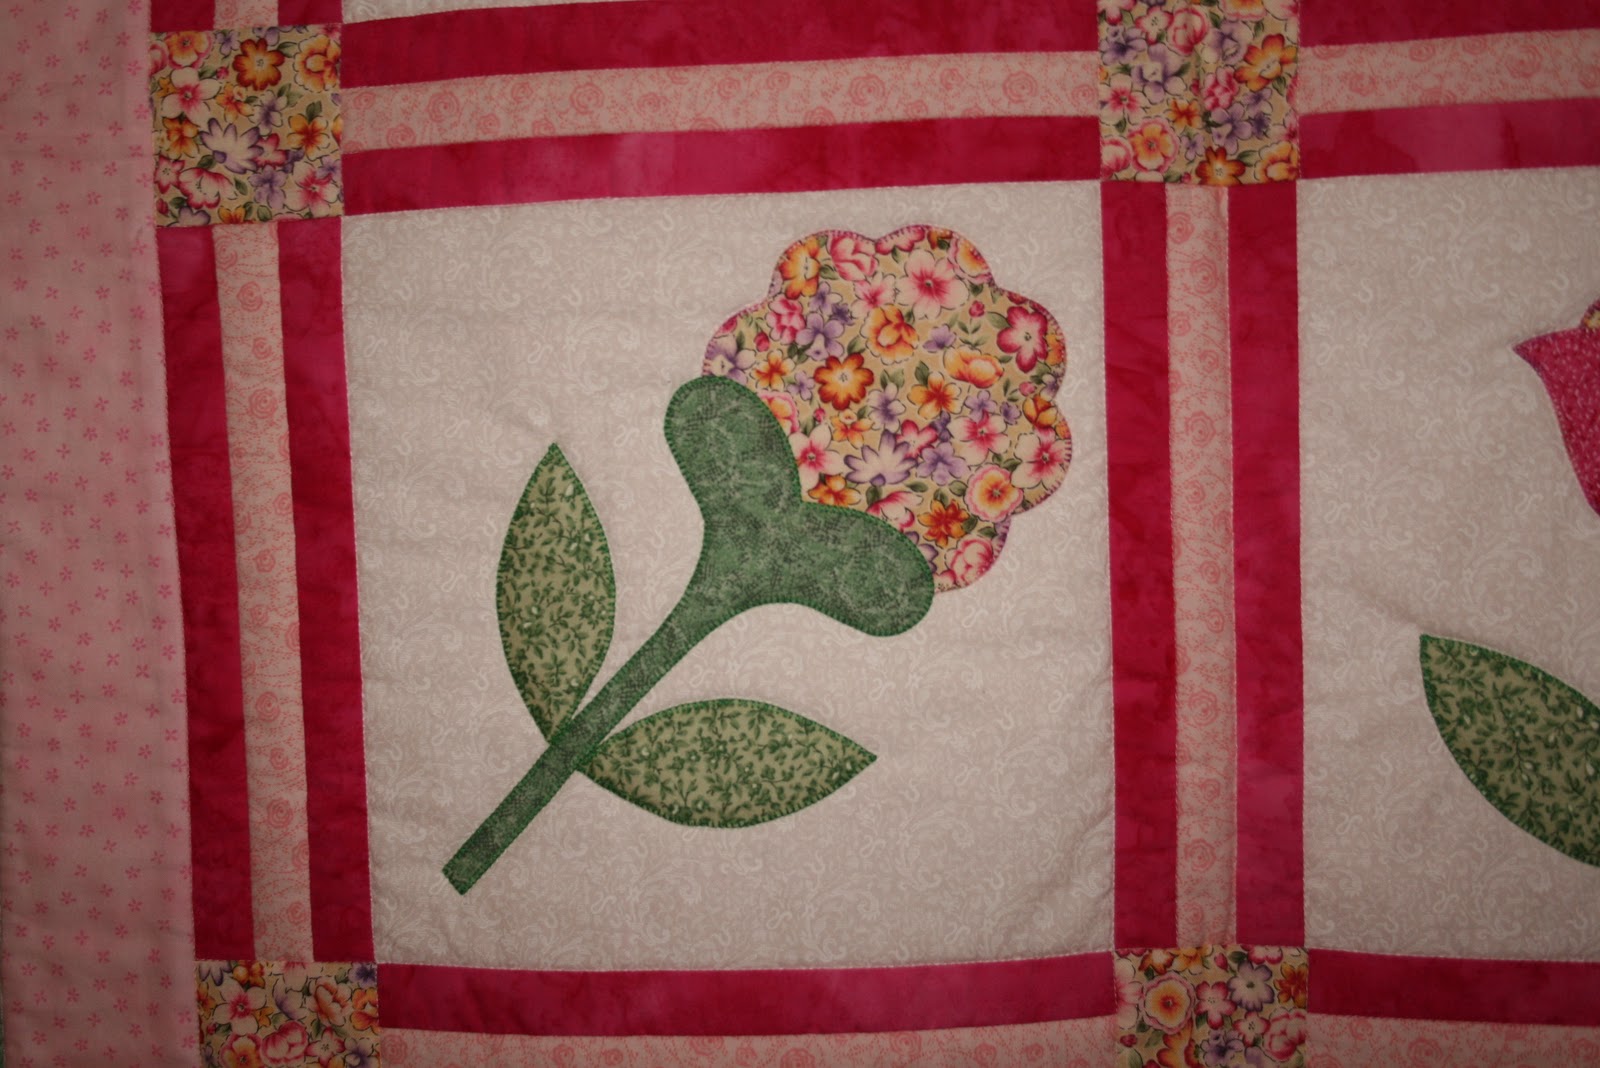
So I decided to have another go at hand applique, I found a luscious pattern from my Applique Flower's book.
Next decision was what type of hand applique technique to use? I tried out loads, but settled on the pritt stick and freezer paper one.
So I started making up my flower petals and leaves etc, I already had all the fabrics I needed, lots of lovely batik ones, but then I fell out with this method (too sticky) so I tried the spray starch with templar plastic method which I loved.
I roughly cut out a large piece of white fabric and using a light box set up, I traced the pattern on using a wash away blue marker pen, then I was ready to go.
Sorry about the colour tone on the photo's


I really enjoyed making this quilt and I learnt a lot such as

1.  Cut the backgroud fabric more accurately, as I had a lot of trouble squaring it up later.
2.  Centre the applique.
3.  Check even after pre washing my fabrics that they don't run (as they did when i washed it to get rid of the blue marker pen lines).
4.  Don't use a pritt stick to shape and then a temporarily attach the applique pieces as they go hard and are difficult to sew.
If you look at the second leaf on the left you can see where the colour ran
5.  Last but not least Don't use a blue washable marker pen again, as then I couldn't then iron my project again until it was completed and washed, and it got quite creased and I still had to sew onto it, some parts of the applique will always be creased I can't do anything about it.

The orange tulip is particularly creased
The quilting on it was the first time i had used a free form feather design and I'm really pleased with how it turned out, I also traced a pattern of a tulip and quilted around that on either side.

Tuesday 18 January 2011

My Mum's birthday present

This is a small wallhanging that I made for my Mother's birthday,  one of her favourite plants are Cyclamen, she has lots of pink and red one's in many colour variations


The pattern is from the Flower Applique book by Keiko Miyauchi
I already had the fabrics in my stash, batiks and tonga


The above photo shows the free motion invisible stitching around the applique, it was the first time that i had used this technique, having before used a straight machine stitch! it was much easier to free motion around it, but a lot more scary LOL


These photo's were taken before it was quilted and binded

It was hand appliqued then quilted with a scroll pattern, that I used for the first time.
I will post the finished photo's soon

New Year's Resolution

To finish my UFO's

This is a small wallhanging that I made a while back, but when I started it, it was intended to be much larger. 


The background blocks are log cabin, I had a new Marti Michell log cabin ruler to play with, and I made up 16 blocks.
The original pattern is from a japanese book by Keiko Miyauchi called Applique Flowers.
I wanted to repeat the pattern four times for a large wall hanging, but at the time size mattered and I was finding that if a made a large quilt, I got intimitated and couldn't finish it, so I just made a four patch block and Yay I finished it!!


But that left me with 12 blocks so I sewed then together like this.


But from the same book was this pattern


So I made up another 4 blocks and sewed them together again to make this


The only thing now is the round pattern doesn't want to fit the square borders so this is the new design


Im now appliqueing on the flowers, but unlike the smaller quilt these flowers are going to be hand appliqued not machined.

Monday 17 January 2011

My sewing set up


This is how I like to set up my sewing area, it's in my dining room, my Dad made my sewing table that my beloved Bernina sits in, the ironing board is lowered to the same height when i'm pieceing.
I've got a little blue bin hanging at the side and two lamps, one has a day light bulb, and ive nicked my Husbands chair.